


Are you tired of wrestling with your floor lamp every time you need to move or clean it?
What if I told you there's a simple solution to make disassembly as effortless as snapping your fingers?
Well, hold onto your hat because I'm about to spill the beans on the ultimate floor lamp disassembly hack.
Let's get cracking!
Preparing for Disassembly
-
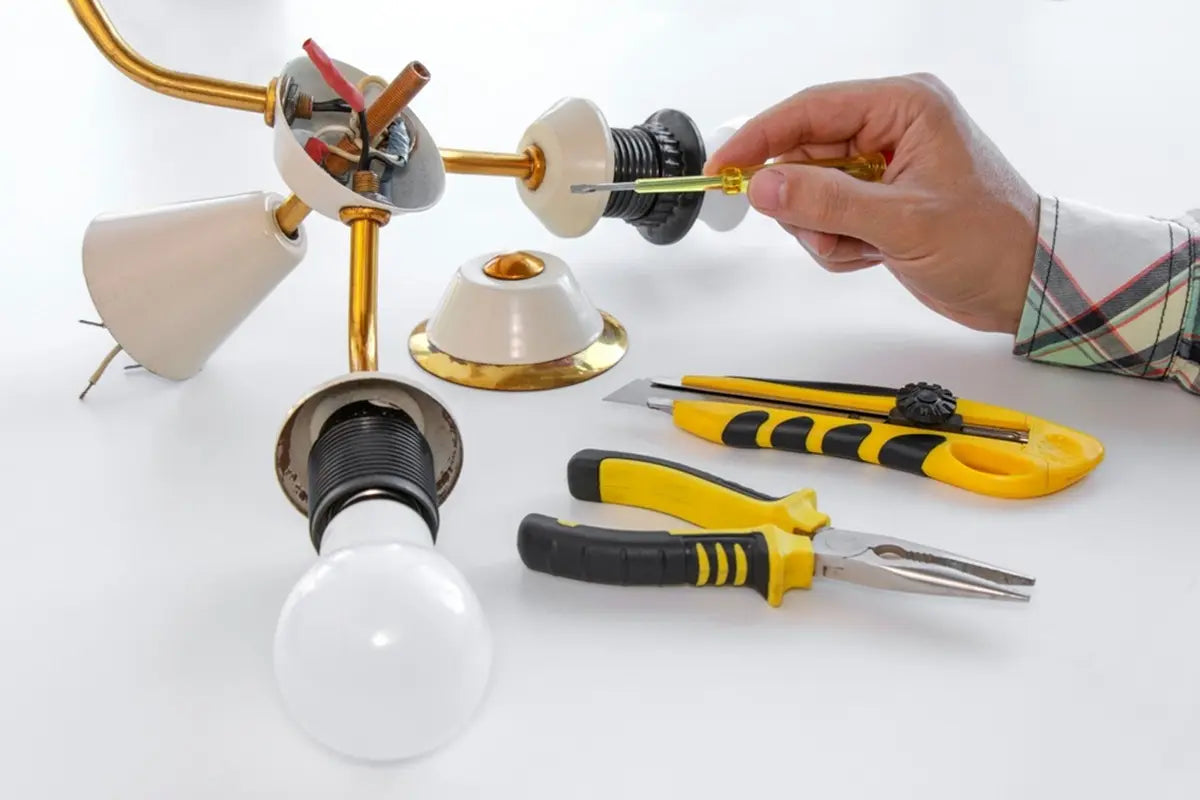
Make sure you have all the necessary tools at hand: a screwdriver, pliers, and any other implements you might need.
- Choose a workspace that offers ample lighting and enough room to maneuver comfortably.
- And most importantly, don't forget to unplug the lamp from its power source to avoid any potential mishaps.
Step-by-Step Disassembly Process
Step1: Removing the Shade
First, locate any screws or clips securing the shade in place. Once found, gently loosen and remove them to free the shade from its position. Carefully lift the shade off the socket or pole, ensuring no damage occurs during this process.
Step2: Disconnecting the Socket and Wiring
Next, focus on the socket and wiring. Use a screwdriver to unscrew the socket from the pole, taking care not to strip the screws. Once the socket is detached, carefully disconnect the wiring, noting any connections for reassembly purposes later on.
Step3: Disassembling the Pole and Base
Now, let's tackle the pole and base. Begin by loosening any screws or bolts that secure the pole to the base. Once loosened, gently separate the pole from the base, ensuring no parts are forcefully pulled apart. If needed for storage or transportation, disassemble the pole into smaller sections, making it easier to handle.
Step4: Additional Component Disassembly (if applicable)
If your floor lamp has shelves or adjustable arms, remove them. Remove these components carefully, ensuring they are packed separately for safekeeping.
Organization and Storage Tips
- After disassembly, gather all screws, bolts, and small parts and place them together in a labeled container.
-
For added convenience, consider using zip-lock bags or small boxes to further secure these parts.
- When storing the disassembled parts, choose a dry and safe location to avoid any potential damage.
Related: How to Pack Floor Lamps for Moving: 7 Damage-Free Steps
Troubleshooting and Maintenance
Begin by inspecting all components for signs of wear and tear, such as frayed wires or loose connections.
To keep your floor lamp in top condition for future reassembly, it's essential to clean and maintain it regularly. Use a soft cloth to gently wipe down the lamp, removing any dust or debris that may have accumulated. Pay special attention to the socket and wiring, ensuring they are free of dirt and grime.
Common issues encountered during disassembly include difficulty removing stubborn screws or bolts or encountering unexpected damage to components. If you encounter any challenges, take your time and approach each problem methodically. Don't hesitate to seek assistance if needed.
Final Thought
We hope you share your experiences and thoughts in the comments section below.
If you're eager to learn more about floor lamp techniques, visit our website for a comprehensive floor lamp tutorial.


1 comment
canada pharmaceuticals online generic
Thank you for sharing your info. I really appreciate your efforts and I am waiting for your further write ups thank you once again.
Leave a comment
All comments are moderated before being published.
This site is protected by hCaptcha and the hCaptcha Privacy Policy and Terms of Service apply.