


Facing a wobbly floor lamp base that's seen better days?
This guide is your quick fix to not just mend but master the art of lamp base repair. Dive into easy-to-follow steps that tackle everything from cracks to crumbles, ensuring your lamp stands firm and stylish.
Say goodbye to a wobbly, cracked floor lamp base, and hello to a sturdy, spruced-up piece that lights up your room.
Keep reading to turn your shaky lamp base into a steadfast beacon of light.
Understanding the Problem
Types of Damage
Floor lamp bases can go through a lot. Imagine them as the unsung heroes holding up the light, quite literally. Over time, they might start showing signs of wear and tear. Let's dive into what can go wrong.
Cracks: Like the fine lines that appear on a well-loved leather jacket, cracks in a lamp base tell a story. Unfortunately, this story often ends with instability. Cracks can appear in any material, from wood to metal and even in plaster.
Crumbling: Ever had a cookie just fall apart in your hand before you could enjoy it? That's what happens to some lamp bases. This issue is especially common in plaster or concrete bases. One day they're holding up fine; the next, they're dropping crumbs like a toddler with a biscuit.
Instability: Picture a toddler on roller skates – that's your lamp base when it becomes unstable. It might lean more than the Tower of Pisa or wobble every time you walk by. Instability often results from loose screws, weakened materials, or an uneven base.
Tools and Materials Needed
Essential Tools
- Screwdriver: For tightening any loose screws that contribute to instability. It's like the butter knife of the tool world – surprisingly versatile.
- Drill: Needed for making holes in new bases or for securing parts together. It's the power tool that makes you feel like a superhero.
- Wire Strippers: If you're dealing with any electrical components, these are a must. They're like scissors but for electricians.
Key Materials
- Concrete or Plaster: Perfect for filling cracks or rebuilding a crumbled base. It's like the foundation makeup for your lamp; it covers all imperfections.
- Vinyl Concrete: A sturdier option for those looking for a long-term fix. It's the heavy-duty moisturizer for your lamp base.
- Metal Weights: Barbell weights or cast iron pieces can add necessary heft. Think of them as the protein shake for your lamp, bulking it up.
- Adhesive or Epoxy: To secure everything in place. It's the glue that keeps relationships, I mean, lamp bases, together.
Alternatives for Hard-to-Find Materials
- DIY Weights: Bags of sand or small pebbles can also add weight. It's like using a book to press flowers but for lamp stability.
- Homemade Adhesive: In a pinch, a mix of flour and water can act as a temporary adhesive. It's the culinary solution to a non-culinary problem.
Protective and Decorative Materials
- Felt or Rubber Pads: To prevent floor scratches. They're like slippers for your lamp base.
- Plywood: For those opting to create a new base. It's the blank canvas for your masterpiece.
- Fabric or Cardboard: Quick fixes for minor issues. They're the band-aids in your first aid kit.
Preparing for the Repair
Safety First
Before diving into the repair, let's talk about safety. Unplug that lamp! Working with electronics is like petting a sleeping tiger – it's best not to wake it up. Find a spot that's as well-lit as a Broadway stage and as stable as your favorite chair.
This isn't just about avoiding a mini heart attack when the lamp flickers to life unexpectedly; it's about making sure you can see what you're doing without playing a game of "hot potato" with your tools.
Assessing the Damage
Now, let's play detective with your lamp base. Give it a good look-over, as if you're trying to find out which of your kids broke the vase. Is the base just wobbling like jelly on a plate, or is it crumbling like a cookie in the hands of a toddler?
Understanding the damage is key – it tells you whether you need a quick fix or a full-blown surgery. Remember, a good repair starts with knowing exactly what you're up against. It's like knowing your enemy, but in this case, the enemy is a wobbly lamp.
How to Fix a Floor Lamp Base
Method 1: Replacing Crumbled Base with Plaster or Concrete
Mix and Pour Plaster or Concrete
If your lamp base looks like it's been through a demolition derby, it's time for a fresh start. Mixing new plaster or concrete to fill the base is like giving your lamp a new pair of shoes. Just make sure the mix vibes well with your lamp's style and give it ample time to dry. Patience is key here; let it set completely before showing it off.
Use of Vinyl Concrete
For those who prefer their repairs to last longer than a Hollywood marriage, vinyl concrete is your go-to. It's like the superhero version of regular concrete, offering extra durability and a longer lifespan.
Method 2: Adding Weight for Stability
Adding Metal Weights
Think of this like bulking season for your lamp. Inserting heavy metal weights, such as barbell weights or cast iron, gives your lamp the stability of a sumo wrestler. It's all about that bass, no treble.
Securing with Adhesive
To ensure those weights don't take a walk, lock them down with strong adhesives or epoxy. It's like making a pinky promise with your lamp base; those weights aren't going anywhere.
Method 3: Use Alternative Materials
Wooden Base Replacement
If your lamp base is on its last leg, why not swap it out for a sturdy piece of plywood? Cut to fit and screwed in securely, it's like giving your lamp a whole new foundation. Don't forget to add rubber bumpers or felt to keep your floors scratch-free.
Metal Flanges
For a touch of industrial chic or added muscle, metal flanges can connect a new base to your lamp with the confidence of a handshake. It's a solid choice for those looking to blend style and strength.
Method 4: Protective Coating and Padding
Applying Felt or Rubber Padding
To keep your floors as pristine as a freshly Zamboni ice rink, stick some felt or rubber padding under your lamp base. It's a small touch that says, "I care about my floors."
Cardboard or Fabric Gluing
In a pinch, thick cardboard or fabric can act as a quick band-aid for minor base injuries. It's not a forever fix, but it'll do the trick until you're ready for a more permanent solution.
Method 5: Comprehensive Rebuild
Rebuilding with New Materials
When your lamp base is more "fixer-upper" than "move-in ready," it might be time for a complete overhaul. Crafting a new base from scratch with solid wood or metal not only gives your lamp a new lease on life but also lets you customize it to your heart's content. It's like a home renovation but for your lamp.
How to Fix a Floor Lamp Stripped Base
To fix a floor lamp with a stripped base, you could try the following steps:
- Remove the screws from the base.
- Fill the stripped holes with a strong adhesive like JB Weld or Durhams putty.
- Allow the adhesive to dry completely.
- Drill new, smaller holes in the adhesive-filled areas.
- Reattach the screws securely into the new holes.
Finishing Touches
Smoothing and Painting
After the heavy lifting of repairs, it's time for the spa treatment. Grab your sandpaper; it's like giving your lamp base a gentle exfoliation. Sand it down until it's as smooth as a jazz singer's voice.
Then, pick a piece of paint that makes your heart sing and give that base a makeover. It's like dressing up for a night out – it should look its best. Apply paint evenly, let it dry, and watch as your lamp starts to strut its stuff.
Adding Felt Pads
Now, for the cherry on top: felt pads. These little wonders are like slippers for your lamp. They glide across your floor, leaving no trace behind. Here's the scoop on attaching them: peel, stick, and press firmly.
It's as easy as putting a stamp on a letter. These pads aren't just about keeping the peace with your floors; they're about giving your lamp a silent step. A small addition, but your floors will sing praises.
Testing and Troubleshooting
After you've given your floor lamp base a facelift, it's time to make sure everything is in tip-top shape. Think of this as the final exam after a semester of hard work. Let's not let all that effort go to waste by skipping the last step.
Safety Check
First things first, give your lamp a good once-over. Wiggle it a bit. Does it stand firm like a tree, or is it swaying like a dancer? We want the former. Make sure all parts are as tight as a drum. A wobbly lamp is a no-go.
Electrical Safety
Now, for the spark of life – electricity. Before you plug it in, check the wires. They should be as intact as a brand-new pair of headphones, with no frays or exposed wires. Safety first! We're aiming for illumination, not sparks flying.
Common Issues After Repair
Even with the best intentions, things might not be perfect on the first try. If your lamp is acting more like a leaning tower than a sturdy column, don't fret. Unevenness and wobbling can often be fixed with a few adjustments. Sometimes, it's as simple as tightening a screw or adding a bit more padding underneath.
Maintenance Tips
Keeping your floor lamp shining bright and standing strong isn't rocket science. It's more like caring for a cherished houseplant. Here are some straightforward tips to ensure your lamp stays in tip-top condition.
Regular Cleaning and Inspection
Dust Off the Years
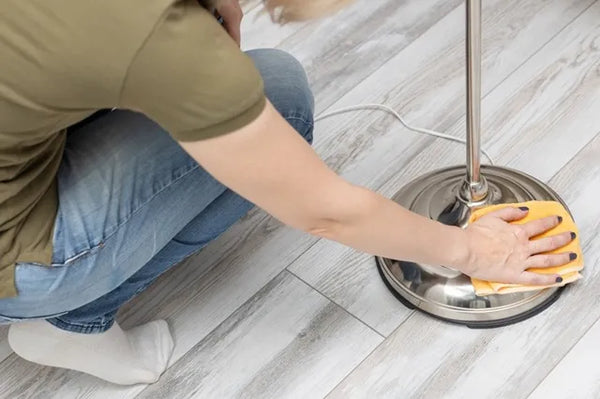
Just like we occasionally need to shake off the cobwebs, so does your lamp. A gentle wipe-down with a soft cloth can keep it looking its best. Think of it as pampering your lamp.
Give It a Check-Up
Now and then, play detective and inspect your lamp for any signs of wear and tear. Loose screws? Tighten them. Frayed wire? Time for some TLC. Keeping an eye on these little details can prevent bigger issues down the road.
Tips to Avoid Common Damage
Location
Place your lamp in a spot where it's less likely to be knocked over by pets, children, or clumsy adults. It's like picking a safe neighborhood for your lamp to live in.
Handle with Care
When moving your lamp, grasp it by the base, not the shade or cord. It's not a suitcase, after all. A gentle touch can prevent a lot of accidents.
Mind the Cord
Keep the cord away from high-traffic areas to avoid trips and snags. It's like setting up a no-run zone in the living room.
Before you go
Fixing a floor lamp base is just one piece of the puzzle in the grand scheme of lighting your space. If you're finding the repair process too complex, or if you simply want to upgrade, check out our latest floor lamps sales for a variety of new and sturdy options.
For those eager to dive deeper and explore every nook and cranny of floor lamp wisdom, we've got just the treasure trove for you.
Visit our floor lamp ultimate guide for insights, tips, and tricks that transform the ordinary into extraordinary.
Don't miss out on this goldmine of information – your journey to mastering the art of floor lamps starts here.
Related articles
How to Make a Floor Lamp Taller [13 Different Ways]
Step-by-Step Guide: How to Fix a Floor Lamp Pole


1 comment
Tim (The Retro Den) Dooley
Good Day… Interesting repair on that Chinese plastic filled cement base… These things are the Achilles Heel of every 20-year-old Made is China Lamp. I have found them to be a royal Pain in the Ass. So what happens when the rest of the plastic fails around that cement weight but yet your epoxy repair works I wonder if any customer of yours has come back complaining about the plastic falling apart that’s why I won’t even touch these things
Leave a comment
All comments are moderated before being published.
This site is protected by hCaptcha and the hCaptcha Privacy Policy and Terms of Service apply.